Gigasampler Tutorial: Lesson 5
Tascam
Gigastudio home
In the course of this lesson we will finish the description of the case-properties menu.
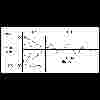
The section "Response" of the case-properties menu includes the regulations for the sample dynamics. They are available various velocity answer curves, shown in fig.1, for the note we are playing: they influence the note volume depending on the intensity with which we play it (its parameter "velocity"). The menu "velocity response" allows to choose between the several types of curves shown in fig.1, and for every type of answer (linear, nonlinear or special) they are available 5 types of dynamics answer (from high to low, as it can be chosen from the slider below). According to the velocity of the note played, it is possible to vary dynamically its release, acting on the menu "release velocity response". This setting works exactly as the previous one and thanks to it we will be able to set the envelope time scaling over velocity.
The last parameter of this section regards the release trigger. We make one small digression on this argument, and to such purpose I will make reference to the file TUTORIAL5.GIG In this instrument I have created 3 regions, in correspondence of E4, F4, G4. I have set up the dimension "release trigger".
What is the release trigger? Try to play E4. You will hear a guitar chord. Now try to release the note: you will hear to begin another sample, (always of the same guitar chord) but played in a different way. The release trigger allows you to play ("to trigger") a sample when the note is "released" (here the name "release trigger").
You will probably ask yourselves: "How can I use such kind of instrument?" Well, being a guitar player I have created the tutorial instrument with the first instrument that came between my hands, but suppose to have some drum samples: for example an open charleston hit (with all its natural release) and a sample of charleston that is being closed.
You could take advantage of the release trigger in order that when your "virtual drummer" hits the charleston, it will begin the open charleston sample, and its sound will continue to decay in natural way until the note is released. At this point it is triggered the "closing charleston" sample and the result could very realistic! This method is moreover much simple and versatile rather than to have numerous single samples "hit on charleston and successive closing" in which the time that passes between the hit and the closing of the charleston is fixed "a priori" from the people who recorded the sample. We have understood therefore what is the release trigger. The parameter "release trigger decay" in the case properties window determines the rate of attenuation of a released triggered sample, based on how long the was held prior to releasing the sample.
In word could be difficult to explain, but try to play E4, count from 1 to 5 and release the note. Then repeat with F4 and G4. You will hear that with E4 (where release trigger decay it is set up on "slow") the volume of the triggered sample remains high even if the note is pressed for a long time. In F4 the release trigger decay it is set up to a half, and you will feel a slightly diminished volume, while in G4, where the parameter is on "fast", the volume of the triggered sample is almost zero. Therefore, if you want that the triggered sample volume is high, independently from the time for which you hold the note pressed, you will have to choose "slow". Instead, if you want that as a result of a note played for a long time does not trigger the sample, you must set "high". Please do various tests, holding the notes pressed for different time, in order to understand the differences between the several settings.
The last part of the case properties menu regards the "mix/layer" section . Here you can set up the sample pan, its attenuation in db or give it a 6db volume boost. It is present a menu ("attn cntr" - attenuation control) in which you can choose a controller (for example the modwheel) to use as volume control for your sample. In this case the volume passes from zero to the maximum regarding of the position of the controller; therefore you theoretically have to disposition "mini-mixer" inside your instrument, by means of which you can fix the relative volume of various sample. The option "invert attn polarity" let you "invert" the controller answer. I have reassumed this example in file TUTORIAL5BIS.GIG : E4 and F4 have both the modwheel set up in order to control the volume, but in F4 I have selected also "invert attn polarity". Note that the volume of the two notes is complementary respect of the CC1, and that the control of the volume is dynamic, so that you can control the volume in real time during sample playback. In same file I have shown the other sections of the Mix/layer menu. It has been created a region that comprises five notes between G4 and B4. Observe that the synth sample pitch it is modified from one note to the other in order that it is always "tuned" to the note we are playing. This is in the classic situation that we always used until now: we can sample a single note (the synth) and extend it for all the keyboard. But if you pass to the other keyboard section, from C5 to E5, where it has been created another region of five notes, you will observe that the sample played does not change its pitch, and it ALWAYS remains to its original tuning (the one to which it has been recorded). This because in the menu case properties - Mix/Layer has been removed the option "pitch trk" ("pitch tracking"). In this way the sample pitch is never altered. This option (removing pitch tracking) can be useful with percussive samples, and in all cases in which it is comfortable to create a region of different notes without modifying sample pitch inside of it. Naturally, the tuning to which the sample will be played can be specified from the "unity note" in the section "sample" of the case properties menu. Then there is an "offset begin" option, in order to make that the sample playback not from the beginning, but from an arbitrary position you can specify. You can appreciate the result playing C4. You will hear that it has been "removed" the sample's attack.
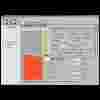
At the end, but very important, there is the "dim bypass" option. Thanks to it you can bypass the current dimensions set up in the note. Also in this case an example will make things clearer than words. In D4 it has been set up the release trigger just like in the other example of this lesson. But if you select the right case of the dimension (that one that corresponds to release trigger the 64-127), you will notice that in the case properties menu it has been selected "dim bypass: (94) Effect 4 Depth" (see figure 2). Now, if controller 94 is set up to zero, the dimension "release trigger" (that one to which it is associated to "dim bypass: (94) Effect 4 Depth") DOES NOT exist: the sample sound WITHOUT the release trigger! The dimension is "active" only when CC94 is beyond the value of 64. Try to play D4 while moving CC94 and you will understand what I mean. This option allows an ulterior degree of freedom in the programming of the instrument and please not that it can be applied independently from the selected dimension.
|
fig.1
|
fig.2
|
Files
tutorial5.gig
tutorial5bis.gig
Lesson Index
Back to lesson 4
Continue to lesson 6
You
don't see frames?
Click here!

