Gigasampler Tutorial: Lesson 3
Tascam
Gigastudio home
In this lesson we will learn how to manage the envelopes in the Editor.
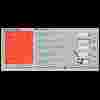
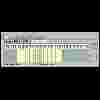
Gigasampler, like all the samplers, allows to apply an envelope both to the sample's playback volume and to the filter, being able to control attack, decay, sustain and release (ADSR). We have various ways to edit the envelopes: from the case properties window and from the main window. Moreover, the region envelope can be visualised graphically directly pressing the button "env graphs" (bottom right): this will make to appear in the Velocity Map the ADSR shape of the volume or the filter. We can select the degree of zoom of ADSR curve visualised in the Velocity Map with to the slider to near of the button "env graphs". We create therefore a region, assigning them a sample (as an example chordE3 of lesson 1), and open the case properties window.
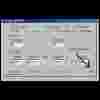
Section "EG1" allows us to edit, in a numerical way, the property of volume ADSR. Section EG1 exactly identical to the EG2, only that EG2 refers to the filter ADSR: all the things that we will say on EG1 apply also for EG2. We will deal the section of filtering in the next lessons. In the window we can set up sample volume in % as soon as it begins playback (pre-attack level), the values (in second) of attack, decay (we have two decays, 1 and 2, that we will describe) and release, and finally the sustain volume, always in %. We find also a button "hold" (only in EG1), that, if pressed, will make the decay 1 begin only when begins also the sample loop (if present). This option is useful if we have samples as guitar, piano, or other percussive instruments, for which we already have sampled the attack (and therefore we can place pre-attack level to 100% and attack Time to 0) and the decay begins when it begins the loop. This guarantees a greater realism in reproduction of particular types of sample. Selecting the case "inf" we will create an infinite sustain (the sample will play until we release the key of the masterkeyboard). In alternative, if we do not select "inf" we can specify sustain time (always in second) through decay 2. We can now see the graphical representation of the envelope pressing the envelope key in window case properties (see figure). Here we can edit graphically all ADSR parameters, while see the numerical values on the left. Remember that, in order to render effective every change made on the case properties window, it is necessary to press "apply EG1": in this way the data are saved and the modifications can be listened to in real time.
Next to the button "Apply EG1" two options are present: "to entire region" and "similar region": by selecting the first before we apply the modifications to all the region (if we are working on a note in which we have defined different dimensions, the modifications are applied to all the dimensions or velocity splits of the region). The second option applies instead the modifications to all the regions defined on the keyboard that have the same one layout, e.g. for which the definition of the dimensions and the velocity splits is identical. These two options are present in any of the case properties window section and their operation is always the same.
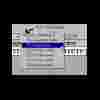
The last way for edit envelopes parameters is still a graphical method. This time select, in the main editor window, "edit EG1 parameters". The same things are worth for editing of the envelope of the filter, by means of the button next to the one evidenced in figure. Selecting one of the options, it will appear a "blue ball" inside of the selected region. Moving this ball up or down we can vary the value of the selected parameter. It is possible to modify the temporal scale of the parameter acting with the slider "scale", left of the region map. This method is most useful when it is necessary to vary the ADSR of various regions at the same time, that we can evidence all together with the usual method. Now try to create various regions and apply this last method to vary their ADRS all together. Try also to see the effect of the three buttons "drag all regions", "drag linear scaling" "drag proportional scaling" present in right side of instrument bar.
|
fig.1
|
fig.2
|
fig.3
|
fig.4
|
fig.5
|
fig.6
|
Lesson index
Back to lesson 2
Continue to lesson 4
You
don't see frames?
Click here!
