Gigasampler Tutorial: Lesson 2
Tascam
Gigastudio home
In this second lesson we will see in detail how to import the samples in the regions, and how to tune in the correct way.
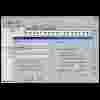
For this tutorial, create a region (as an example in correspondence of E3) and import 4 samples of one instrument (not percussive, but chromatic samples of an instrument, like for example the four guitar samples cleanE3, distE3, chordE3, muteE3 of the previous lesson ). Double clik on one of the samples in the wave pool: you will see the window "sample properties". This window defines the name of the sample and sets up its UNITY NOTE that says at which tune the sample will be played by default, when it is assigned to one region. Option for tuning the sample is present in cent of semitone (fine tuning - cents): with this option we can correct slightly detuned samples. Finally, we see if a loop is set up in the sample and, in the case, how it is defined (start, end, lenght).
In order to modify the loop setting we advise to use an external editor. I will explain now what we mean for UNITY NOTE of a sample in the WAVE POOL: this is the note at which the sample is considered tuned: if the unity note is C4, the sample will be played to the right tune only if the region is created in correspondence of note C4. If the region is created in C3, and we assign to this region a sample whose unity note is C4, the sample will come played one octave lower. If we set many tones of difference between unity note and the note to which the sample effectively it is played, it is possible to hear irrealistic effects of slowing up or down and flanging. Now go in the edit - preferences. Here you find a section called "unity for imported wav files".
When we import samples, to these it will come assigned by default a unity note. This can be the middle C ("default to middle C", and we can select the middle C above), or we can force the editor to assign a "correct" unity note for our sample, in the case the filename contains this information. To this purpose, when we sample an instrument (for example a guitar or a synth), it will be opportune to specify in filename the note to which that sample refers. For example, if we have acquired F#3 from a expander, we will give as filename something like "pad_synthF#3". In this way, selecting the case "guess from filename (e.g. * C#4.wav)" in the edit - preferences window, we will force the instrument editor to automatically assign as unity note to our pad_synth sample the note F#3. For this reason the samples used in the lesson one tutorial had name like cleanE3, cleanF3, etc...
Consequently, if you select "guess from filename (e.g. * C#4.wav)" and then import the sample cleanE3, to the sample will be assigned the unity note E3 (try to believe!). It is also possible to set the editor in order to guess unity note from the note MIDI number: we remember that the notes in the MIDI protocol are indicated with numbers from 0 to 127, and F#3 correspond to number 42. Selecting "guess from filename (e.g. * 61.wav)" and importing the file "pad_synth42", unity note F#3 will be assigned. We now explain how to assign samples to regions and how to set the proper tune. First, observe that the definition of a dimension with 4 split make to appear 4 cases in the window dimension. We can select each of the cases with a left click, or select more than one at the same time holding CTRL key and click on one first case, then on a second one, etc. Is also possible to select more contiguous cases holding left mouse button inside of one of them and drawing a rectangle. In order to assign a single sample to one of the region's case, we select one of the four cases and then we simply "drag" the chosen sample in the velocity map.
We can repeat the operation, assigning to each case each of the 4 samples, in order to have 4 sounds to be controlled by the mod wheel (like the tutorial in lesson 1). If for some reason we want to assign the same sample to more splits (for example we want to assign the same sample to all cases), we simply select all the cases and drag the sample in the velocity map. Now we can see, moving from one case to another, that each of them corresponds to the same sample. One of the next lessons will be entirely dedicated to the detailed explanation of the "dimension" concept. For semplicity, we create now a region of only one note extension and we define in it no dimension.
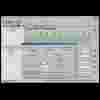
A double click on velocity map will open the (fundamental!) window "case properties", divided in various sections. We now describe the "sampler" section, that manages the sample tuning in the selected region. Assing to the region a sample (cleanE3): we observe that unity note in the window case properties automatically assume the value E3: wherever is the position of the created region, the fundamental sample tuning is always E3. If the created region is in C4, the sample "will play like" C4: it will be automatically tuned to note we choose. It is fundamental to learn that wave pool's sample unity note and case properties window's unity note are two different things: while the unity note associated to the sample in the wave pool is fixed and will be used like fundamental tuning every time we assign the sample to a region, the unity note relative to the region (in the case properties window) can be changed at will, and it will not influence the settings presents in wave pool. Now we try to change unity note in case properties, for example setting it one octave higher. Keep in mind that every time that you change a parameter in case properties you have to "apply" the modifications made by pressing the button "apply sampler info". The sample will be played now one octave lower, because we have placed one octave higher the fundamental tuning. We now expand the region, in order to cover more notes: we can see that the sample is automatically assigned to every note in the interval, and each note is automatically tuned.
Remember that every time you make a modification to a gig file, you can listen to the modification simply pushing the "load file" button The file tutorial.gig that you can download summarizes the exposed concepts. Notice that the unity note values in case properties window have been set up so that:
C3 will play like C3 (unity note=C3): the region (C3) and the
unity note (C3) correspond, and the sample do not suffer any tuning alterations.
E3 will play like E3 (unity note=E3): same as above
B3 will play like B3 (unity note=E3): unity note is placed 7 semitones more
low (E3), and therefore the sample is raised 7 semitones: it corresponds to
B3
The section of keyboard from E4 to B4 will play notes from E4 to B4 (unity
note=E4)
|
fig.1
|
fig.2
|
fig.3
|
Files:
tutorial.gig (100Kb)
Lesson Index
Back to lesson 1
Continue to lesson 3


